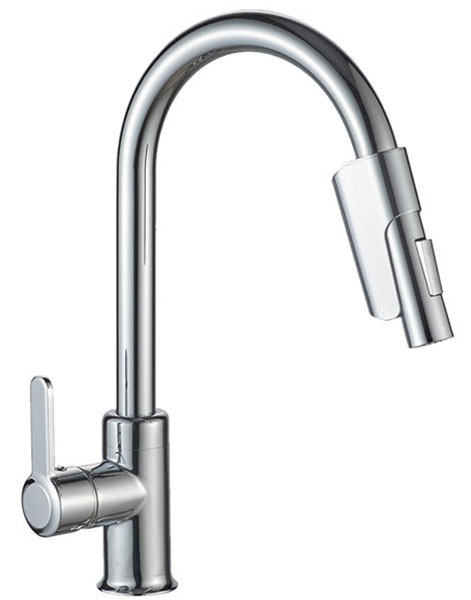
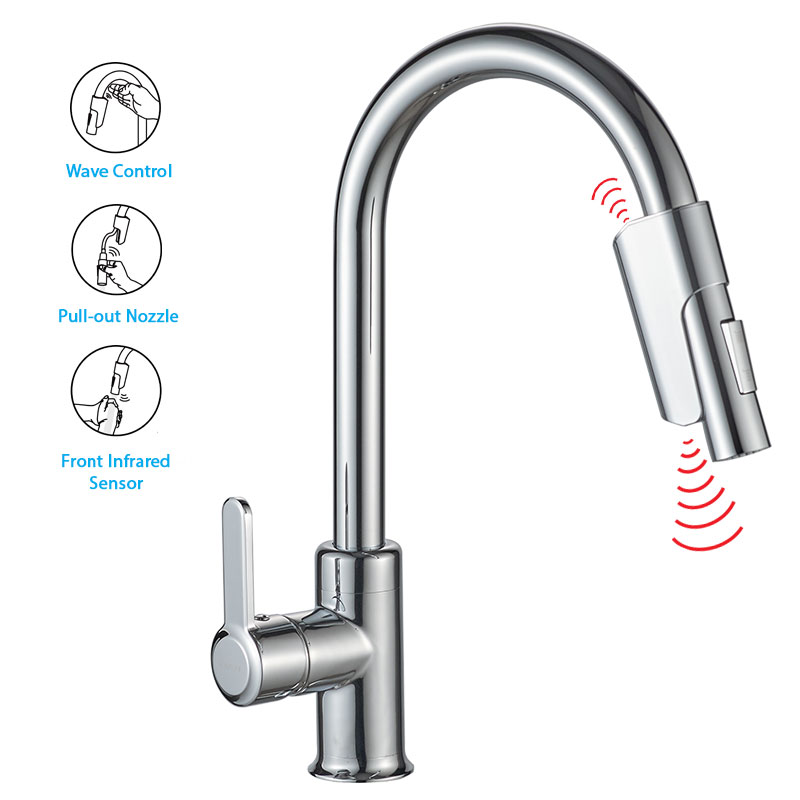
AKT-6102 | MANUAL & AUTOMATIC KITCHEN SENSOR TAP
Swan-neck 2-in-1 automatic kitchen tap with infrared 'no-touch' sensor and manual ON/OFF control
AKT-6102
2-in-1 automatic kitchen tap with infrared 'no-touch' sensor and manual ON/OFF control
Features:
Swan-neck design
Infrared 'no touch' Wave Control Function
Manual ON/OFF control lever
Swivel-neck design sensor tap
2-in-1 Integrative Dual activation design
Automatic or Manual water control system
Chrome-plated Steel Finish
Double water supply feeds (Hot and Cold)
Power Options: 4x AA Alkaline (batteries only)
Pull-out Spout Design
Hands-free Infrared 'No-touch' Activation
Solid-brass outer-shell construction (*with ABS)
Finish: Chrome-plated
Flexible supply hoses
Water Feed: Double (hot & cold) water supply
Finish: Chrome-plated
Type: Deck-mounted
Power Option
Batteries only
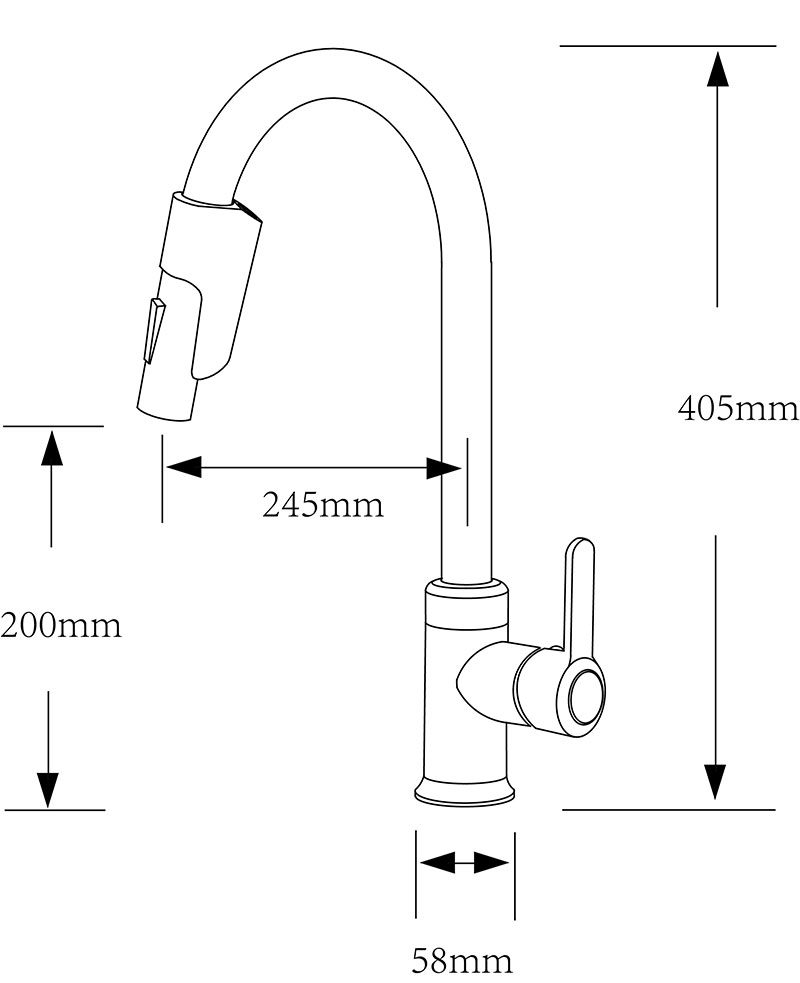
Drilling a hole?
32mm
Water Pressure
0.75bar (Minimum) - 1bar (Recommended).
Buy Product

Lorem Ipsum
Lorem ipsum dolor sit amet, consectetur adipiscing elit. Nunc quam urna, dignissim nec auctor in, mattis vitae leo. Lorem ipsum dolor sit amet, consectetur adipiscing elit.
Lorem Ipsum
Lorem ipsum dolor sit amet, consectetur adipiscing elit. Nunc quam urna, dignissim nec auctor in, mattis vitae leo. Lorem ipsum dolor sit amet, consectetur adipiscing elit.
| Display | 5.2" |
| Camera | 12MP |
| RAM | 4GB |
| OS | iOS |

Incredible product
John Smith, 20 Jan 2018Lorem ipsum dolor sit amet, consectetur adipiscing elit. Donec augue nunc, pretium at augue at, convallis pellentesque ipsum. Lorem ipsum dolor sit amet, consectetur adipiscing elit.
Incredible product
John Smith, 20 Jan 2018Lorem ipsum dolor sit amet, consectetur adipiscing elit. Donec augue nunc, pretium at augue at, convallis pellentesque ipsum. Lorem ipsum dolor sit amet, consectetur adipiscing elit.
Incredible product
John Smith, 20 Jan 2018Lorem ipsum dolor sit amet, consectetur adipiscing elit. Donec augue nunc, pretium at augue at, convallis pellentesque ipsum. Lorem ipsum dolor sit amet, consectetur adipiscing elit.
Technical Details:
Dia. of Water Inlet Pipe: G1/2" (DN15)
Water pressure range: 0.7 (Min) - 8 Bar (Max)
Flow Rate of Manual Mode: 6L/Min (fitted with flow regulator aerator)
Flow Rate of Automatic Mode: 6L/Min (fitted with flow regulator aerator)
Max. Hot-water Temperature: 70C
Power consumption: =0.3mW
Respond time: 1 Second
Battery Power Consumption: 4xAA alkaline batteries
Silent Consumption: 0.003mW
Environment Temperature: 1-45 C
Pipe Threading: British Standard Whitworth (BSW)
Noise Class: 1
Finish: Chrome-plated
Voltage: DC6V only
Not applicable
1x Sensor Tap
1x Transformer (with 3-pin UK-type plug)
1x Battery Box
1x 1x Battery-box Bracket
2x Flexible G1/2" *500mm Connection Flexible Hoses
2x Non-return Valves With Pre-filter
1x Amphibious Screwdriver
Fittings and screws
Not applicable
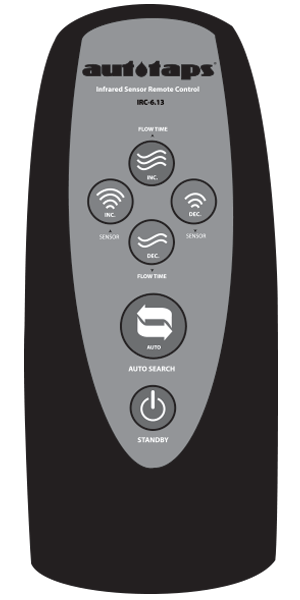
IRC-613 REMOTE CONTROL
 |
|
||||||||||||


Related Products: AKT Series